7 Road Base Installation Mistakes That Cause Driveway Ruin

A properly constructed road base should provide decades of rut-free, unyielding structural support for driveways, parking pads, and building foundations. Yet every year, thousands of newly laid gravel and paved surfaces develop severe ruts, potholes, washboarding, and edge blowouts within months of completion.
Earthwork forensics and publications from the National Stone, Sand & Gravel Association (NSSGA) reveal that over 80% of road base failures are caused by avoidable installation mistakes, rather than defective materials.
Here are the top 7 road base installation mistakes and the field-proven methods to prevent them.
1. Mistake #1: Compacting Lifts That Are Too Thick (>4–6 Inches)
The 7 Most Common Road Base Installation Mistakes (Featured Snippet)
- Dumping Aggregate Directly into Soft Mud (Skipping woven geotextile fabric).
- Single-Lift Overfilling (Trying to compact more than 4 inches loose with a walk-behind plate).
- Bone-Dry Compaction (Compacting without adding moisture to achieve OMC).
- Neglecting Subgrade Excavation and Native Dirt Tamping.
- Omitting a 2% Center Crown (Creating water puddles and potholes).
- Using Clean Stone Instead of Dense-Graded Aggregate (Lacking fines to lock together).
- Forgetting the 15–20% Compaction Shrinkage Factor When Ordering.
Attempting to dump 8 to 12 inches of aggregate and compact it in a single pass is the number one cause of deep sub-base failure.
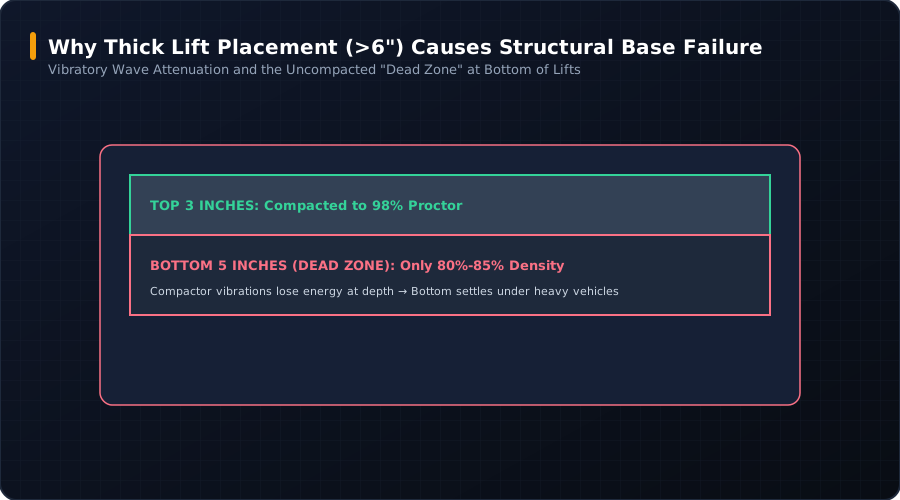
The Physics:
Vibratory compaction energy dissipates exponentially with depth. When an 8-inch layer is rolled, the top 3 inches reach 98% Proctor density, but the bottom 5 inches remain loose, honeycombed, and uncompacted. When heavy delivery trucks or RVs drive over the surface, the weak bottom zone collapses, causing permanent wheel ruts.
The Fix: Always install road base in maximum 3-to-4-inch compacted lifts. For a 6-inch driveway, spread a 3.75-inch loose layer, compact thoroughly, then spread and compact the second 3.75-inch layer.
2. Mistake #2: Forgetting the 1.5%–2% Drainage Crown (Flat Driveway Syndrome)
Water is the ultimate destroyer of road bases. When an unpaved road or driveway is graded perfectly flat, rainwater cannot drain off the surface, violating road crown engineering standards outlined in the FHWA Gravel Roads Construction & Maintenance Guide.
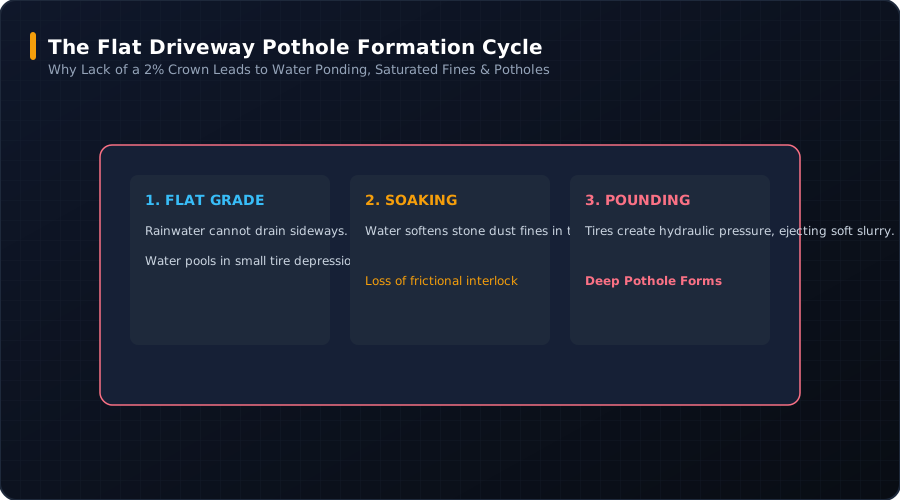
The Pothole Cycle:
- Water pools in minor surface depressions.
- Standing water saturates and softens the stone dust fines.
- Passing vehicle tires generate hydraulic shockwaves, ejecting the softened rock slurry out of the depression.
- Within weeks, tiny puddles transform into massive, axle-breaking potholes.
The Fix: Shape an “A-frame” center crown with a 1.5% to 2% cross slope (approx. 2 to 3 inches of height rise in the center relative to the outer edges). Water must shed into roadside ditches immediately.
3. Mistake #3: Skipping Geotextile Fabric on Clay Subgrades
Dumping crushed stone directly on soft, wet clay or silty topsoil ensures that your gravel will disappear.
Under repeated tire loading, heavy rock punches down into the mud while saturated clay squirts upward into the stone voids. Once contaminated by clay, the road base loses its mechanical interlock and turns into soup.
The Fix: Always lay a high-strength woven geotextile fabric (such as 200W) over native subgrade soil before placing your first lift of aggregate. The fabric provides permanent subgrade separation and load-bridging membrane action.
4. Mistake #4: Compacting Bone-Dry or Flooded Aggregate
Compacting dry aggregate is like trying to pack dry sand at the beach—high inter-particle friction prevents stones from sliding into a dense matrix. Conversely, over-saturating the base creates incompressible hydrostatic pore pressure, causing the road base to “pump” like rubber.
The Fix: Moisture-condition aggregate to its Optimum Moisture Content (OMC, typically 5.5%–7.5%). Perform the Hand Squeeze Ball Test: a handful of base should form a tight cast ball that holds its shape without dripping excess water.
5. Mistake #5: Using Rounded River Gravel Instead of Angular Road Base
Many homeowners order smooth, decorative pea gravel or rounded river rock for their driveway base because it looks attractive in garden photos.
Why Round Gravel Fails as a Base:
Rounded stones have smooth, polished surfaces and zero fines. Under vehicle tires, they act like ball bearings, rolling away from the wheel track and creating instant ruts.
The Fix: Always use 100% crushed, angular dense-graded aggregate (such as Crusher Run, ABC Stone, or 3/4” Minus). The sharp, fractured faces lock mechanically together, while stone dust fills every void.
6. Mistake #6: Failing to Proof-Roll the Native Subgrade
Placing premium road base over uncompacted, organic topsoil or rotting tree roots is like building a brick house on a mattress.
The Fix: Excavate all organic topsoil down to stable mineral soil. Proof-roll the native dirt floor with a fully loaded dump truck or heavy compactor before laying fabric or aggregate. Any area that deflects or leaves deep tire ruts must be dug out and backfilled with structural fill.
7. Mistake #7: Underestimating Compaction Shrinkage (or Double-Counting It)
Because loose aggregate delivered on an open haul truck contains 18% to 22% air voids, ordering only the unadjusted loose volume will leave your driveway thin and short by 2 to 3 truckloads. Conversely, many estimators double-count compaction by applying the shrinkage factor to a certified compacted density, over-purchasing stone by 20%.
The Fix: When calculating loose truck delivery volume (cubic yards), apply the 1.18 to 1.22 void expansion multiplier plus a 5%–10% site waste buffer. When calculating certified quarry scale weight (tons), convert in-place volume using the lab-tested compacted density (1.82–1.90 tons/yd³) and add only the 5%–10% site grading waste factor—ensuring accurate order weights with zero double-counting.
Contractor Quality Assurance Checklist
| Checkpoint | Verified Standard | Sign-Off |
|---|---|---|
| Subgrade Preparation | Topsoil stripped, proof-rolled, zero pumping | [ ] Verified |
| Geotextile Membrane | Woven 200W fabric installed with 18”-24” overlaps | [ ] Verified |
| Material Specification | Angular Crusher Run / ABC Stone (Dense-Graded 3/4” Minus) | [ ] Verified |
| Lift Thickness Control | Maximum 3” to 4” compacted lift depth per pass | [ ] Verified |
| Moisture Conditioning | Hand squeeze ball test confirms 5.5%–7.5% OMC | [ ] Verified |
| Compaction Passes | 4 to 6 passes per lift with 50% width overlap | [ ] Verified |
| Drainage Crown Pitch | 1.5% to 2% cross-slope to side ditches verified | [ ] Verified |
Calculate your exact aggregate tonnage and compaction shrinkage with our Master Road Base Calculator or check tool choices in our Plate Compactor vs. Roller Guide.
Road Base Calculator Standards & Editorial Desk
Standards-BasedAll mathematical models, dry densities, and lift schedules published on Road Base Calculator are derived directly from published civil engineering standards: AASHTO M147, ASTM C33 / D2940, ASTM D698 / D1557, and state DOT specifications. Read our Methodology and our Editorial & Review Policy. Have a quarry test report or correction? Submit a correction.
Material & Application Specific Calculators
Access dedicated estimating pages tailored to specific quarry materials, regional state specifications, and project foundations.