How to Fix a Muddy Driveway with Road Base & Geotextile Fabric

Every spring thaw and heavy rainy season, thousands of rural and suburban homeowners face the same nightmare: a gravel driveway that has transformed into a churned, rutted sea of mud. Cars bottom out, delivery trucks refuse to pull up, and walking to the mailbox requires knee-high rubber boots.
The instinctive reaction is to call a local quarry and dump 20 tons of clean rock or round gravel into the mud. This is a guaranteed waste of money.
In this guide, supported by guidelines from the FHWA Gravel Roads Construction & Maintenance Guide and USDA Forest Service Unpaved Roads Manual, we explain why dumping rock into mud fails and provide the 3-step engineering reconstruction method to permanently stabilize muddy driveways.
1. Why Dumping Rock into Mud Always Fails
When you dump clean gravel (like #57 stone or river rock) directly into soft, wet clay mud:
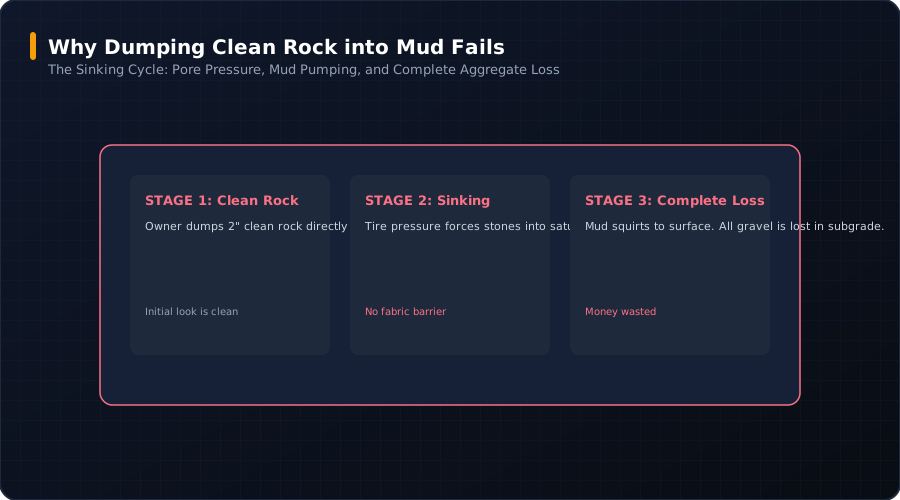
- Hydrostatic Sucking & Punching: Vehicle tires exert intense point pressure (35 to 80 psi). The heavy stones punch straight down into the soft subgrade.
- Mud Slurry Upwelling: Saturated clay squirts upward through the open air spaces between the stones.
- Complete Aggregate Loss: Within 30 to 60 days, all the new gravel has vanished below grade, leaving the driveway just as muddy as before.
2. The 3-Step Permanent Restoration Method
How to Fix a Muddy Driveway Permanently (Featured Snippet)
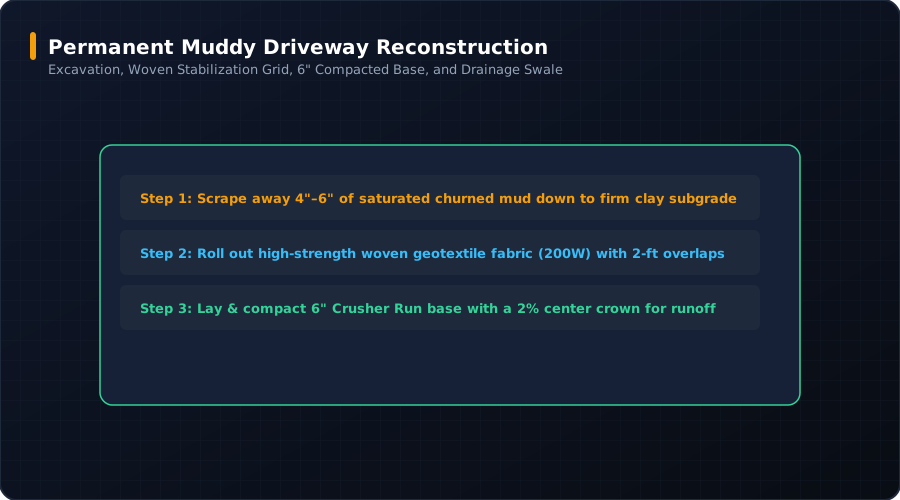
- Excavate the Saturated Mud: Scrape away top soupy mud down to firm native subgrade.
- Lay Woven Geotextile Fabric: Roll out high-strength woven fabric across the entire road width to bridge weak spots.
- Install 6–8 Inches of Road Base: Lay dense-graded aggregate (crusher run or ABC stone) directly over the fabric.
- Crown the Driveway: Shape a 2% center crown (1/4” drop per horizontal foot) to shed rainwater into side swales.
- Compact in Two 3-Inch Lifts: Tamp thoroughly at optimum moisture using a vibratory roller or heavy plate compactor.
To fix a muddy driveway permanently, you must address three fundamental earthwork components: subgrade separation, base depth, and surface drainage.
Step 1: Excavate the Saturated Mud Layer
- Do not build on top of slurry: Use a mini-excavator or skid-steer loader to scrape away the top 4 to 6 inches of churned, saturated mud until you reach firm, undisturbed subgrade soil.
- Establish a Rough Grade: Grade the native subgrade with a slight outward slope toward drainage ditches.
Step 2: Install High-Tensile Woven Geotextile Fabric
This is the magic component that prevents future mud problems:
- Roll out a heavy-duty woven geotextile fabric (such as 200W or Class 1) across the full width of the driveway.
- Overlap seams by 24 to 36 inches (60–90 cm).
- The fabric provides tensile membrane bridging, preventing vehicle tires from pressing base stone into underlying clay while permanently stopping mud from migrating upward.
Step 3: Lay & Compact 6 to 8 Inches of Road Base
- Use Dense-Graded Aggregate: Order Crusher Run (3/4” Minus) or ABC Stone. Unlike clean round gravel, dense-graded road base contains crushed stone dust that locks into an unyielding, water-shedding crust.
- Install in Two 3-to-4-Inch Lifts: Spread the first 4 inches, moisture-condition with water, and compact thoroughly with a heavy vibratory plate or drum roller. Then spread the second lift.
- Shape a 2% Center Crown: Grade the center of the driveway 2.5 to 3.5 inches higher than the shoulders (an “A-frame” profile). Water must shed sideways into roadside ditches within seconds of hitting the road surface.
3. Surface Drainage & Ditch Line Management
Even the strongest road base will soften if submerged under standing water for weeks at a time. Implement these crucial drainage controls:
| Drainage Solution | Purpose | When to Install |
|---|---|---|
| Center Crown (1.5%–2%) | Sheds rain off the driving surface into side swales | On 100% of all unpaved driveways |
| Roadside Swales / Ditches | Carries runoff away from the road subgrade | Parallel to all low or flat driveway runs |
| Corrugated HDPE Culvert Pipe | Channels ditch water safely beneath driveways | At all driveway entrance intersections |
| French Drain Trench | Intercepts hillside subsurface groundwater springs | Along the uphill bank of hillside driveways |
4. Cost Comparison: Temporary Patch vs. Permanent Fix
| Approach | Initial Cost (100 ft Driveway) | 5-Year Maintenance Cost | 5-Year Total Cost | Long-Term Result |
|---|---|---|---|---|
| Temporary Quick-Fix (Dumping clean gravel into mud every spring) | $800 (1 truckload) | $3,200 (4 repeat loads) | $4,000 | Still muddy, perpetual ruts |
| Permanent Reconstruction (Excavation + Fabric + 6” Compacted Base) | $2,400 (Materials + Fabric) | $200 (Minor raking) | $2,600 | Rock-solid, rut-free for 15+ years |
Calculate the exact tonnage of road base and geotextile square footage needed for your driveway with our Driveway Base Calculator and Geotextile Fabric Guide.
Road Base Calculator Standards & Editorial Desk
Standards-BasedAll mathematical models, dry densities, and lift schedules published on Road Base Calculator are derived directly from published civil engineering standards: AASHTO M147, ASTM C33 / D2940, ASTM D698 / D1557, and state DOT specifications. Read our Methodology and our Editorial & Review Policy. Have a quarry test report or correction? Submit a correction.
Material & Application Specific Calculators
Access dedicated estimating pages tailored to specific quarry materials, regional state specifications, and project foundations.